반응형
저번에는 저장을 했다.
이번엔 불러와서 화면에 출력해보자
디비는 저번의 test테이블을 쓰겟다.
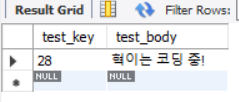
이러한 데이터가 있고 이거를 불러와서 화면에 출력해보자
먼저 server.js를 수정하자
const express = require("express");
const app = express();
const port = 3001; // react의 기본값은 3000이니까 3000이 아닌 아무 수
const cors = require("cors");
const bodyParser = require("body-parser");
const mysql = require("mysql"); // mysql 모듈 사용

var connection = mysql.createConnection({
    host : "localhost",
    user : "root", //mysql의 id
    password : "root", //mysql의 password
    database : "tistory", //사용할 데이터베이스
});

connection.connect();

app.use(bodyParser.urlencoded({ extended: false }));
app.use(bodyParser.json());
app.use(cors());

app.get('/', (req, res) =>{
    res.send('혁이는 코딩 중!')
})

app.post("/idplz", (req,res)=>{
    const test = req.body.test;
    // console.log(req.body);
    connection.query("INSERT INTO test (test_body) values (?)",[test],
    function(err,rows,fields){
        if(err){
            console.log("실패");
            // console.log(err);
        }else{
            console.log("성공");
            // console.log(rows);
        };
    });
});

app.post("/callbody", (req,res)=>{
    connection.query("SELECT * FROM test",
    function(err,rows,fields){
        if(err){
            console.log("불러오기 실패");
        }else{
            console.log("불러오기 성공");
            res.send(rows[0]);
        }
    })
})

app.listen(port, ()=>{
    console.log(`Connect at http://localhost:${port}`);
})
저번의 코드에서
2020/10/17 - [React] - React - Mysql 연결하기(데이터 저장
React - Mysql 연결하기(데이터 저장)
1. 준비 mysql mysql workbench를 사용할 것이다. 2. database 만들기 및 express에 연결하기 database와 table을 만들어주자. 나는 tistory라는 database와 test라는 table을 만들거다. CREATE DATABASE tistory;..
coding-hyeok.tistory.com
post callbody를 추가했다.
App.js
import React, { Component } from 'react'
import './App.css';
export default class App extends Component {
  state = {
    testbody : "",
    data : "",
  }

  handleChange =(e)=>{
    this.setState({
      [e.target.name] : e.target.value,
    });
  }

  submitId = ()=>{
    const post ={
      test : this.state.testbody,
    };

    fetch("http://localhost:3001/idplz", {
      method : "post", // 통신방법
      headers : {
        "content-type" : "application/json",
      },
      body : JSON.stringify(post),
    })
    .then((res)=>res.json())
    .then((json)=>{
      this.setState({
        testbody : json.text,
      });
    });
  };
  onCall =()=>{
    fetch("http://localhost:3001/callbody",{
      method:"post",
      headers : {
        "content-type" : "application/json",
      },
      body : JSON.stringify(),
    })
    .then((res)=>res.json())
    .then((json)=>{
      this.setState({
        data : json.test_body,
      });
    });
  };
  render() {
    return (
      <div>
        <input onChange={this.handleChange} name ="testbody"/>
        <button onClick = {this.submitId}>Submit</button>
        <h1>{this.state.testbody}</h1>
        <br/><br/><br/><br/><br/>
        <h2>데이터가져오기</h2>
        <h3>{this.state.data}</h3>
        <button onClick={this.onCall}>가져오기</button>
      </div>
    )
  }
}
저번의 코드에서 onCall함수와 데이터가져오는부분을 추가해줬다. 이걸 npm start를 하면
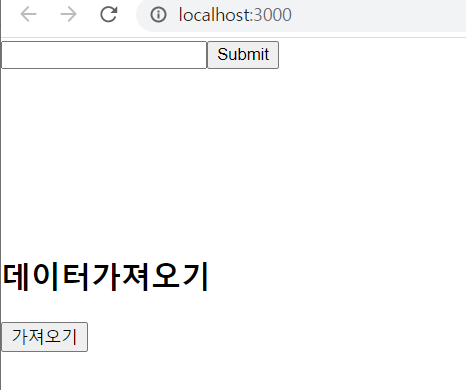
이런 화면이나온다 '가져오기' 버튼을 눌러보자
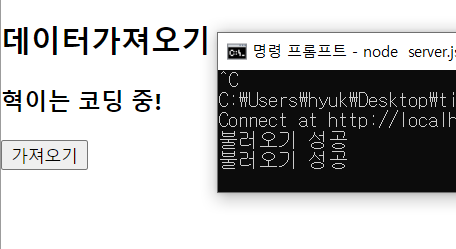
잘 작동되는 것을 확인할 수 있다.
다음에 소켓을 사용하여 채팅을 한번 해보겠다.
그리고 그후에는 소켓과 디비 등을 적절히 활용해서 자그마한 게시판을 만들어 보도록하자
오늘도 열코다 !
반응형
'React' 카테고리의 다른 글
| [React] react router (v6) (1) | 2021.12.16 |
|---|---|
| [React] React -Socket을 이용한 채팅기능 (3) | 2021.01.04 |
| React - Mysql 연동하기, 연결(데이터 저장) (0) | 2020.10.17 |
| React와 Express연동하기 2 (0) | 2020.10.15 |
| React와 Express연동하기 1 (2) | 2020.10.15 |


